This section Introduces how to install and configure Flexible User License.
Contents
| Table of Contents | ||||
|---|---|---|---|---|
|
2.1 Installation
Flexible User License can be easily installed by using the 'Find New Apps' menu on the admin page.
1. Log in to Confluence admin page.
2. Go to [Add-on Apps > Find new apps] menu.

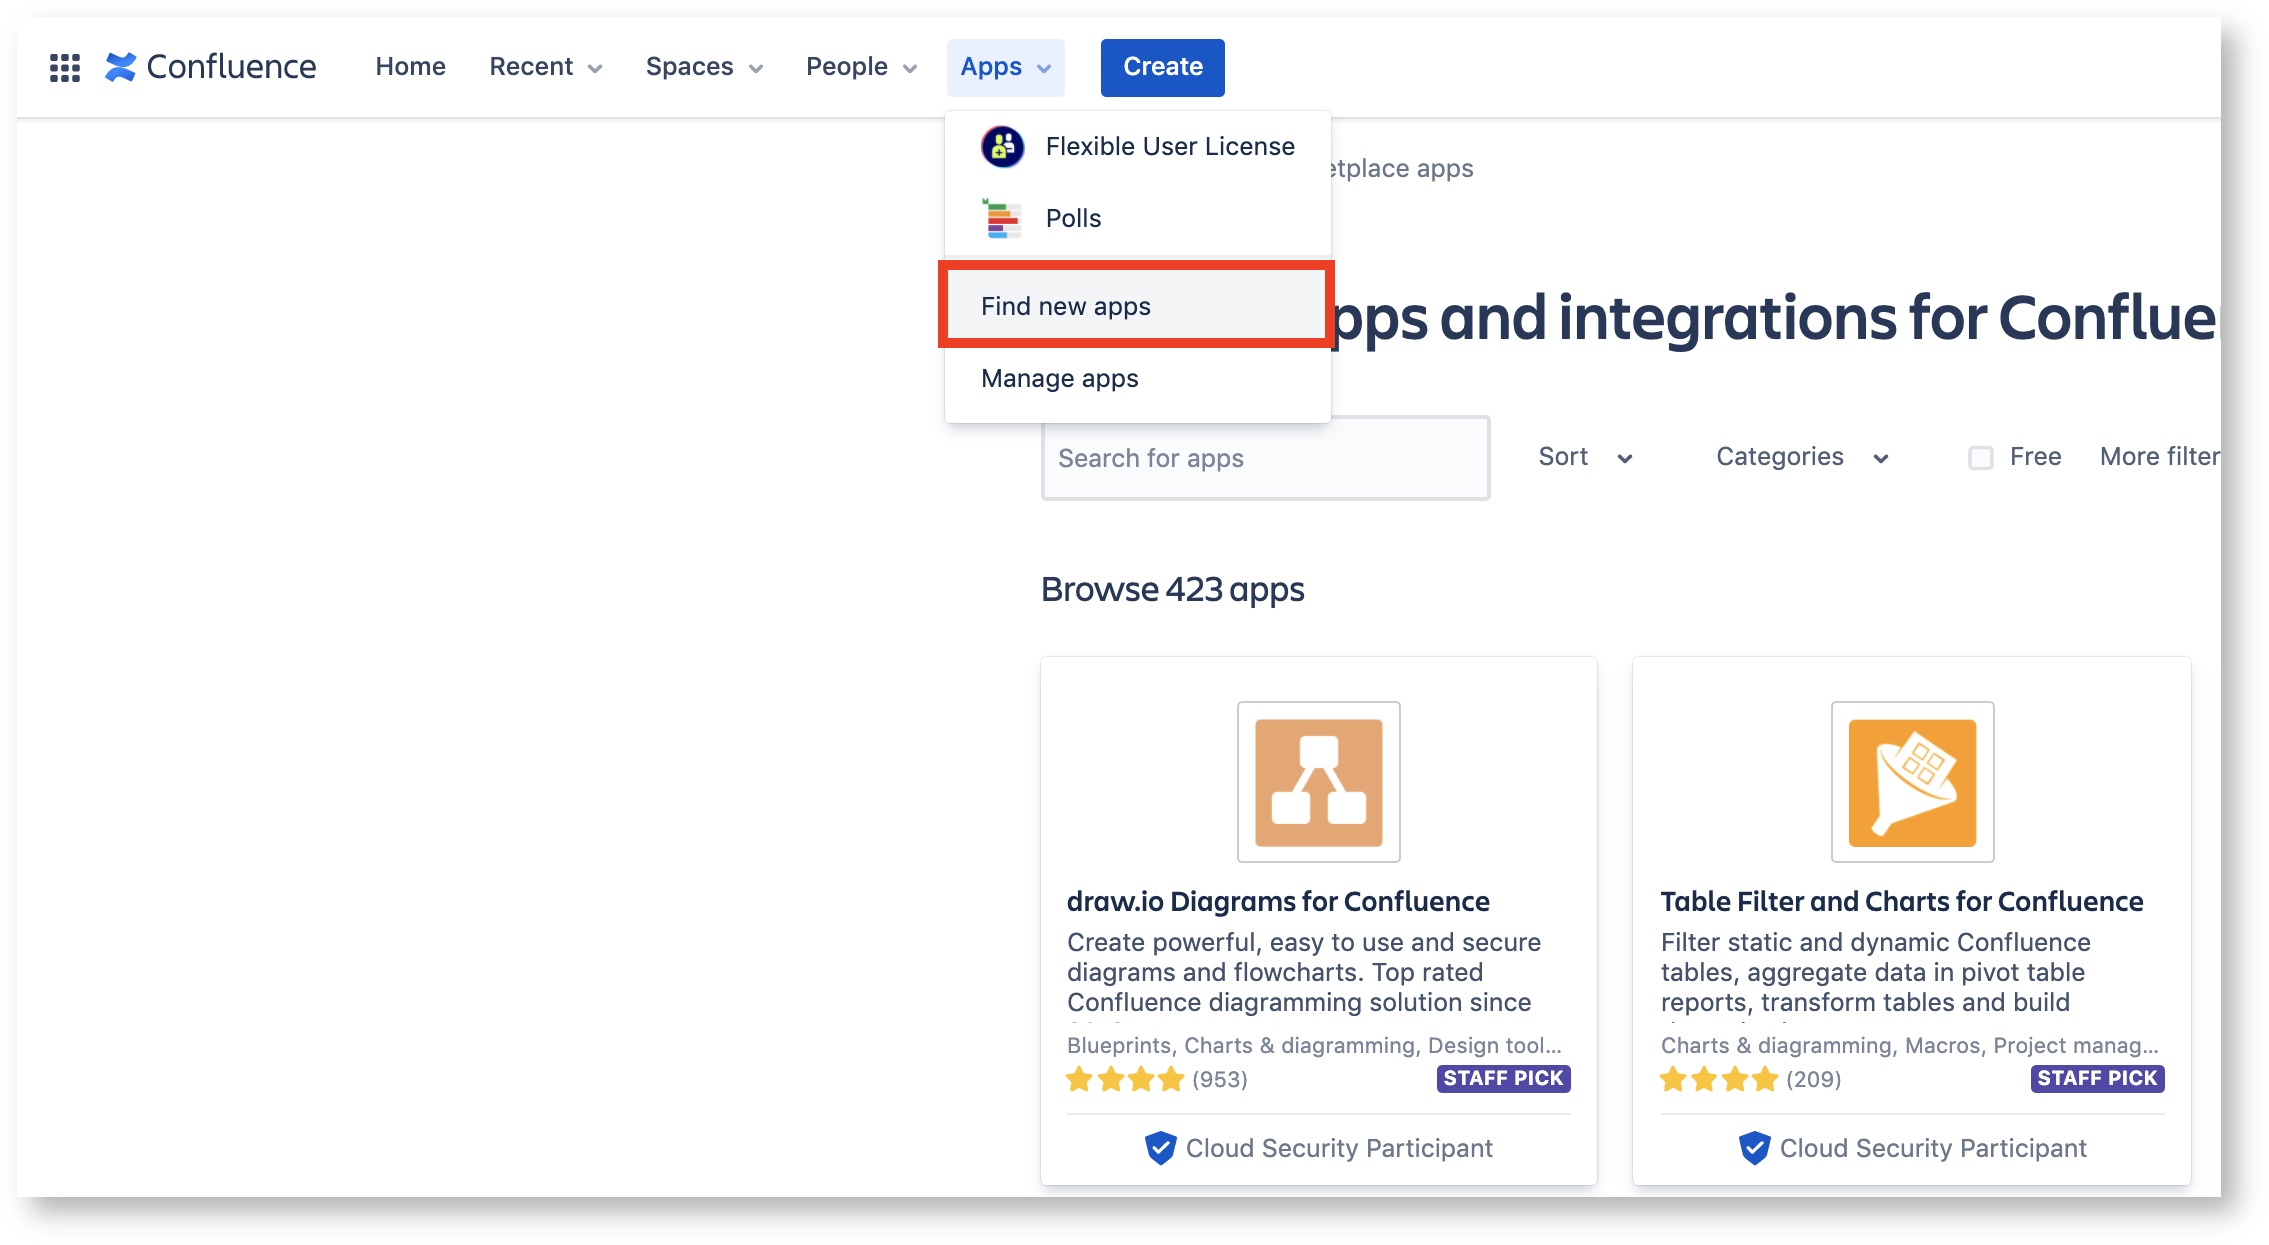
3. Type ’Flexible User License’ in the Marketplace search box to search.
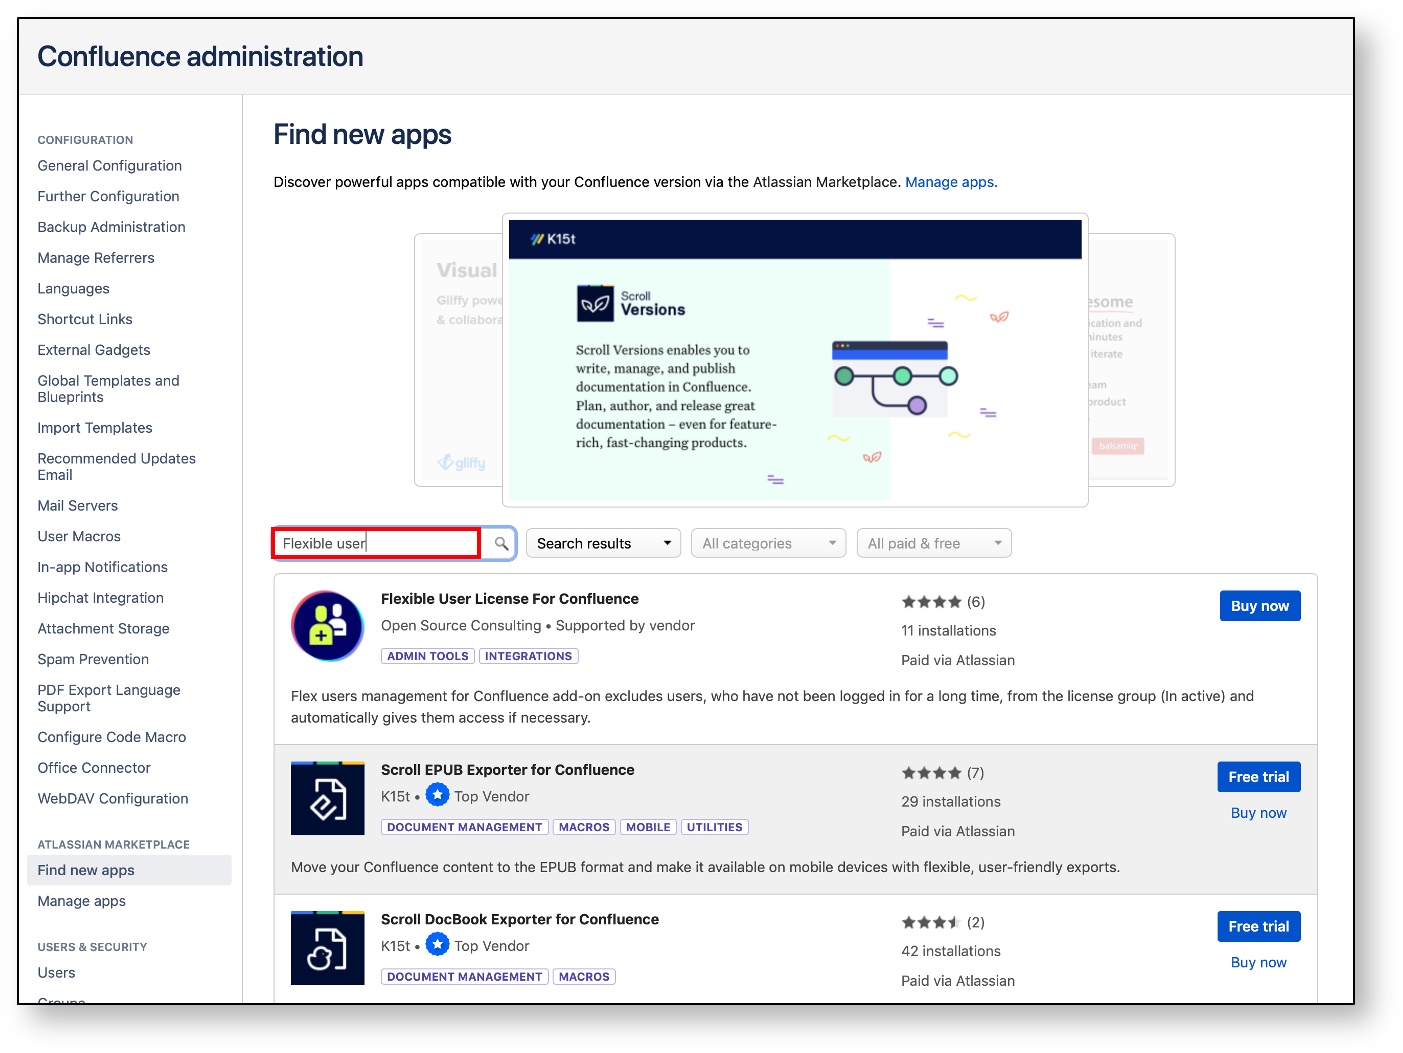
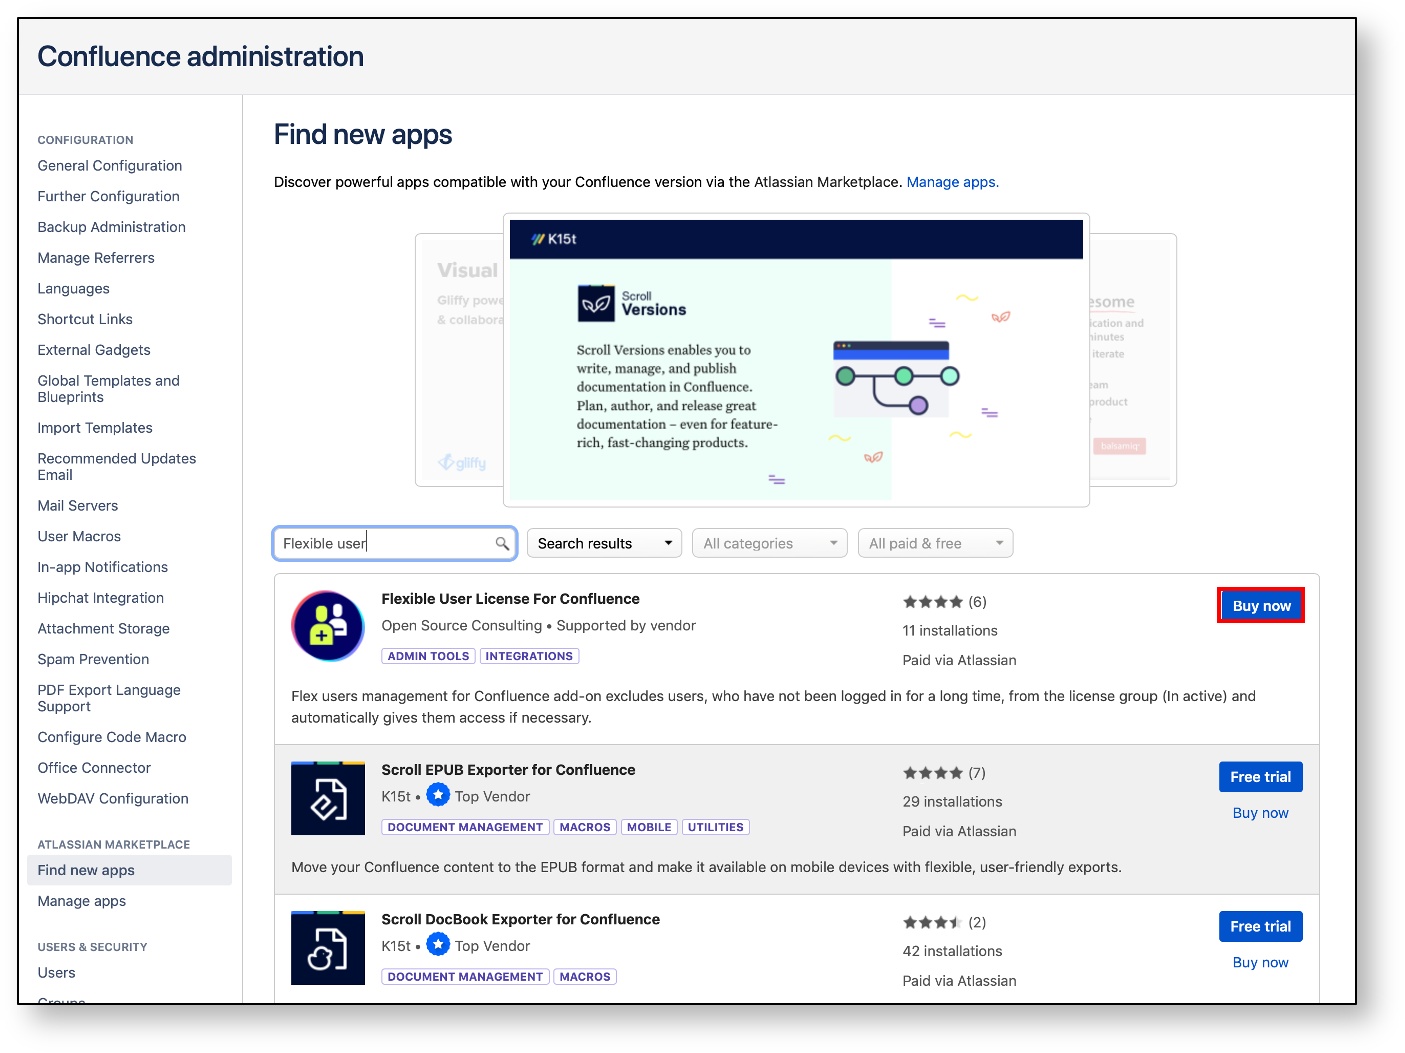
4. Click the [Buy now] button on the search result to install the app.
2.2 Configuration
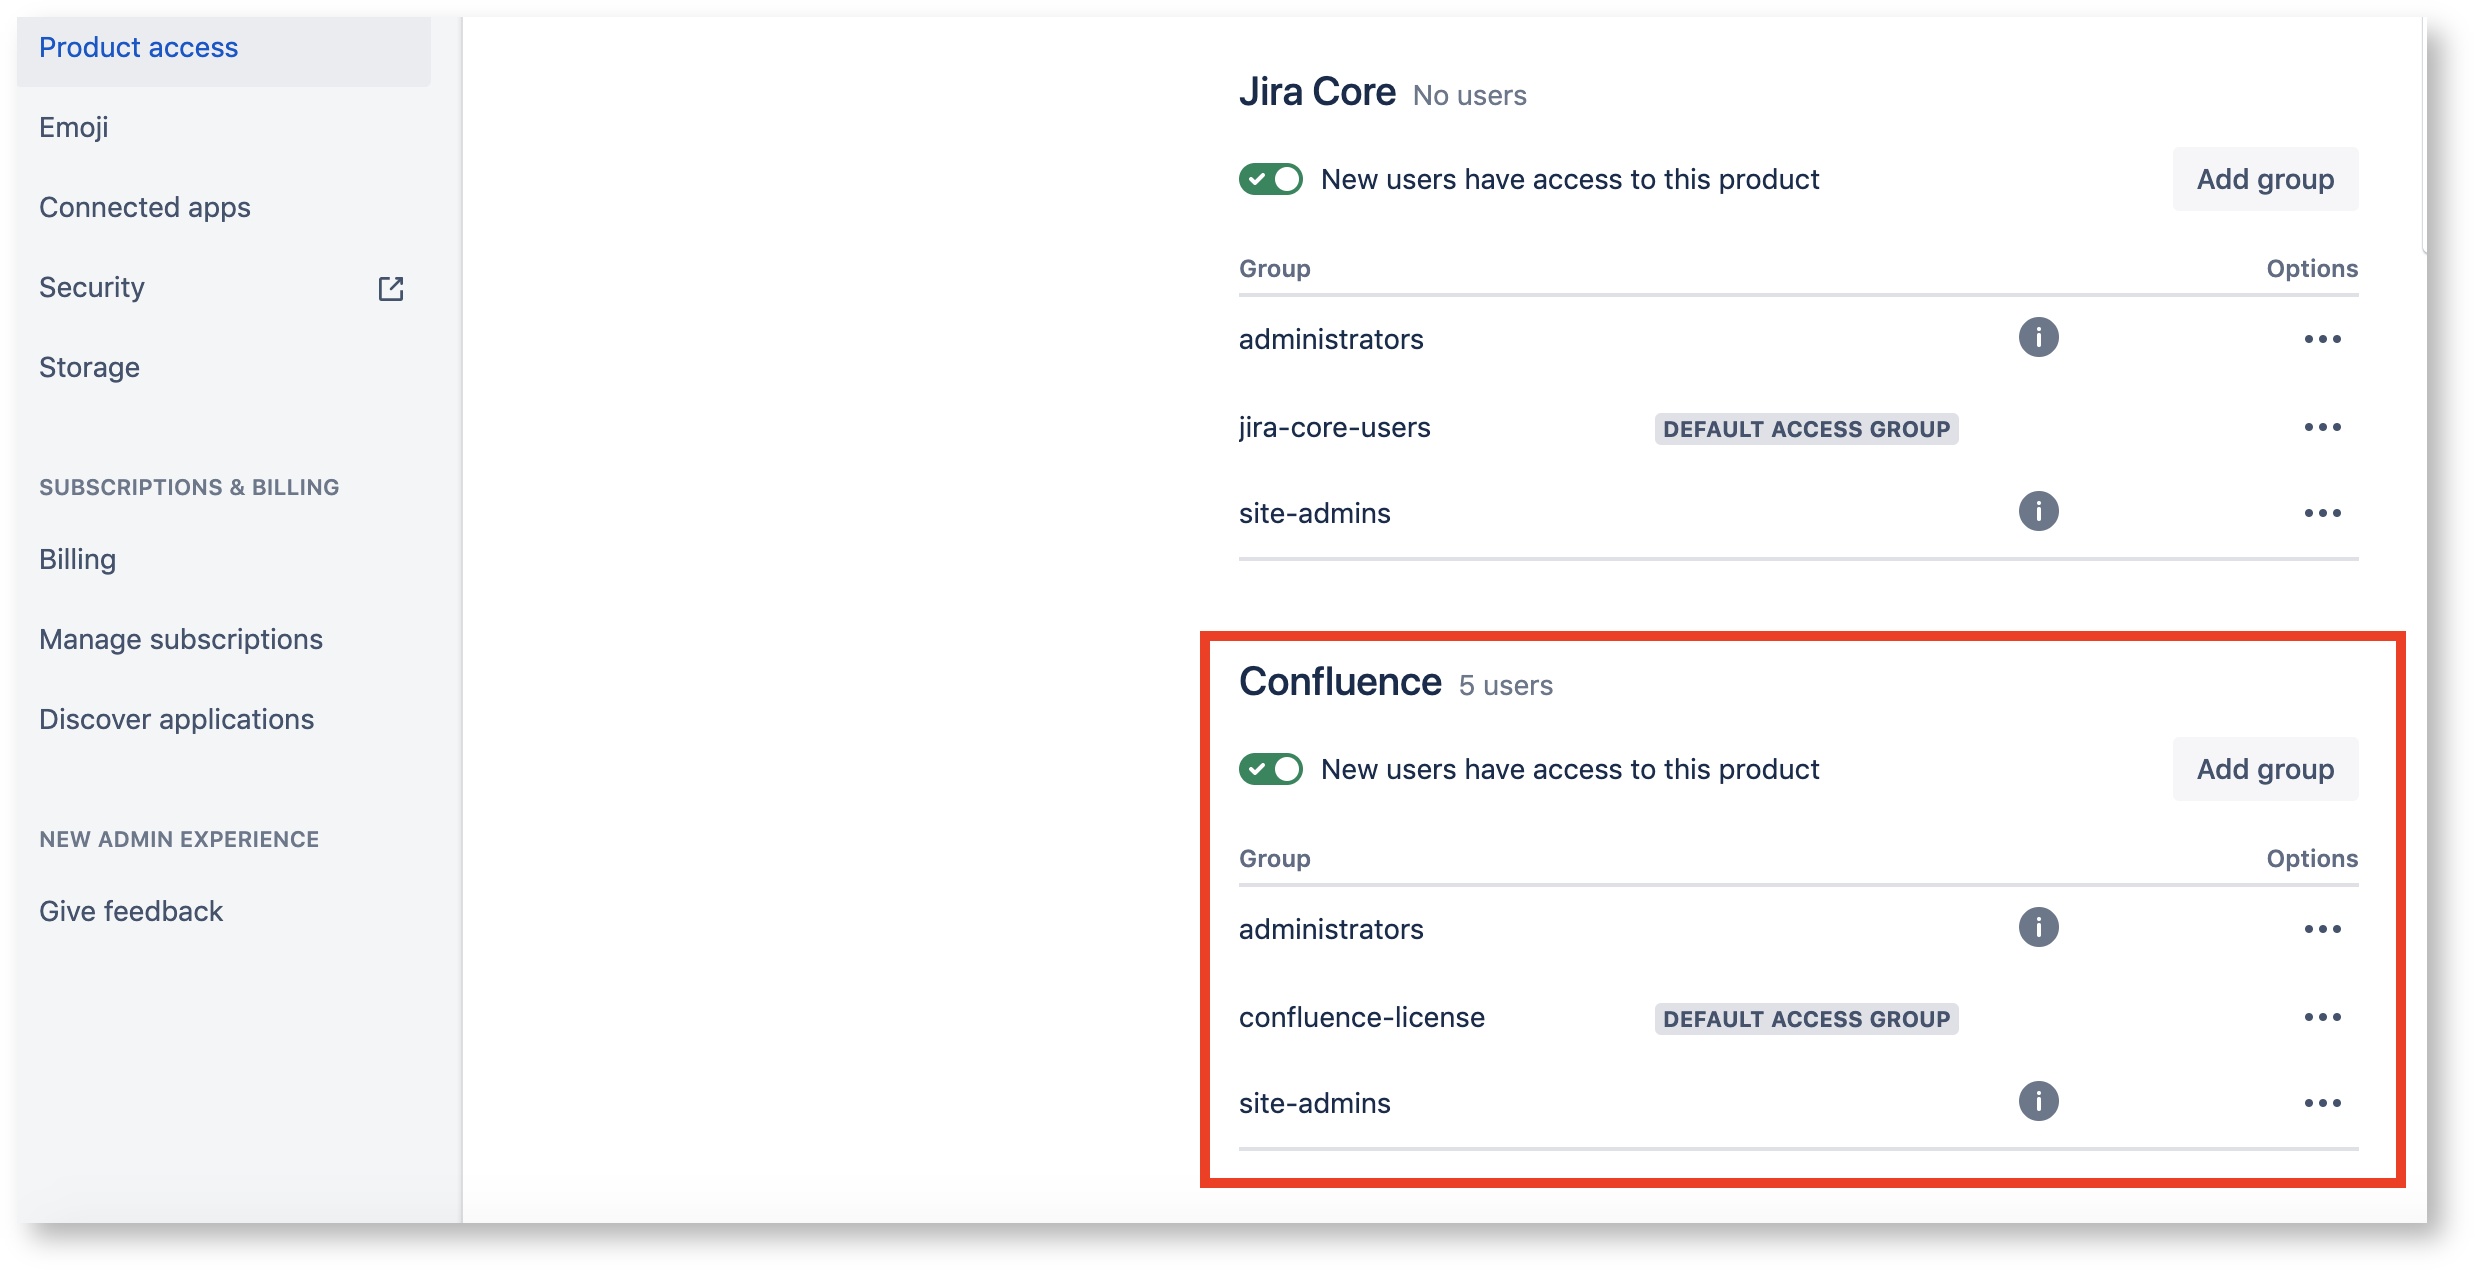
In order to start Flexible User License, it is necessary to set global permission product access in advance.
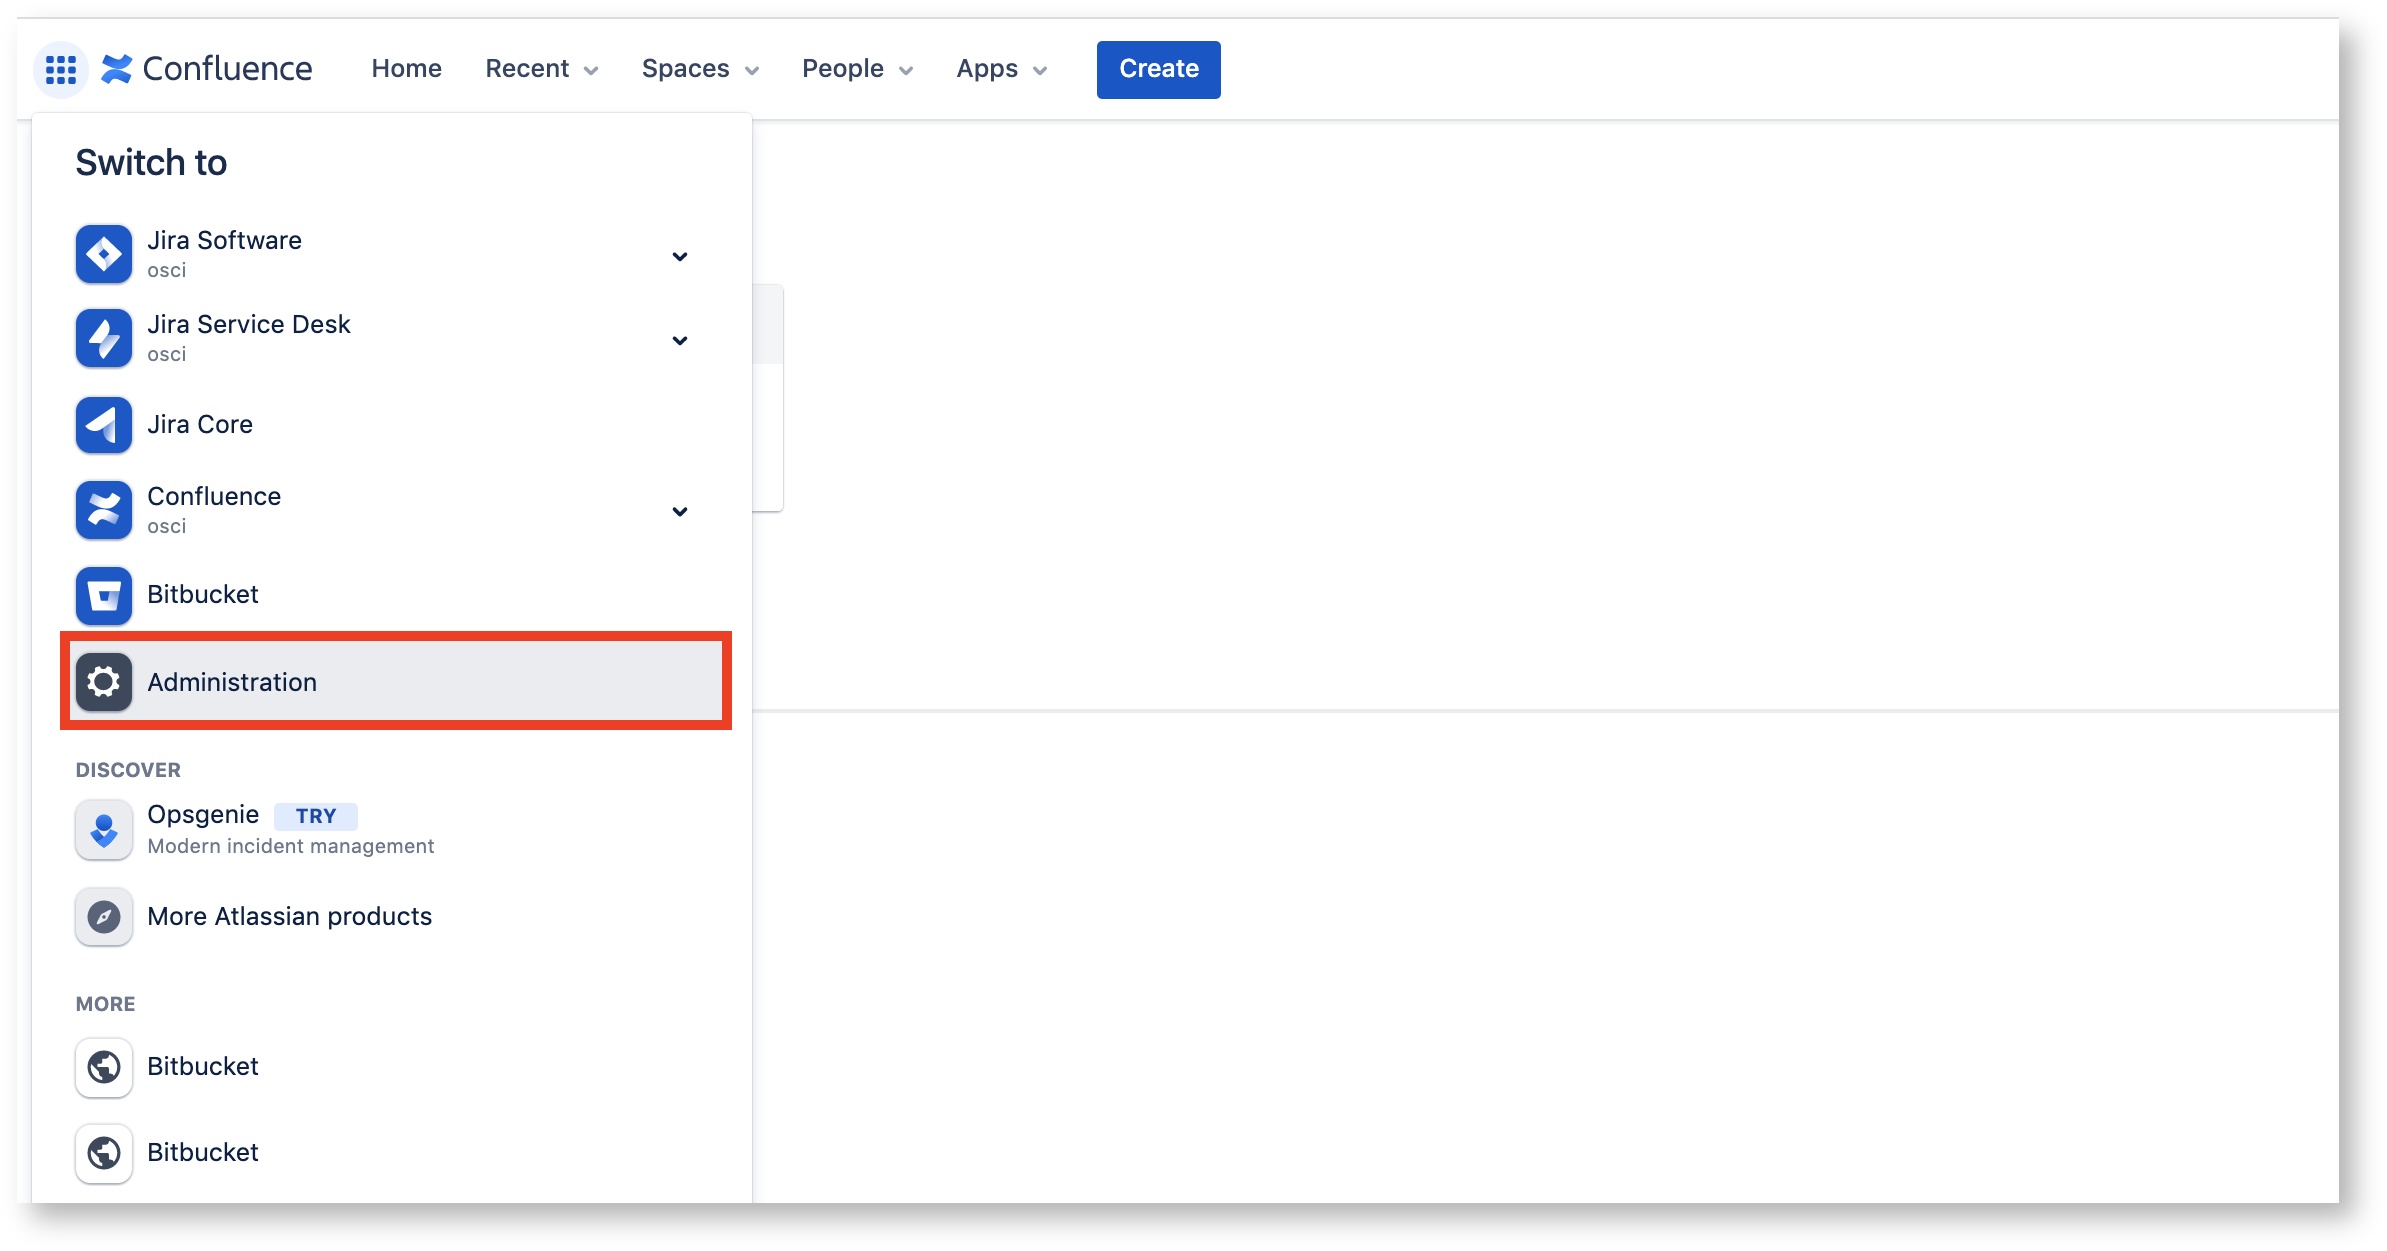
1. Click the [Users & Security> Global permissionsAdministration > Product Access] menu.
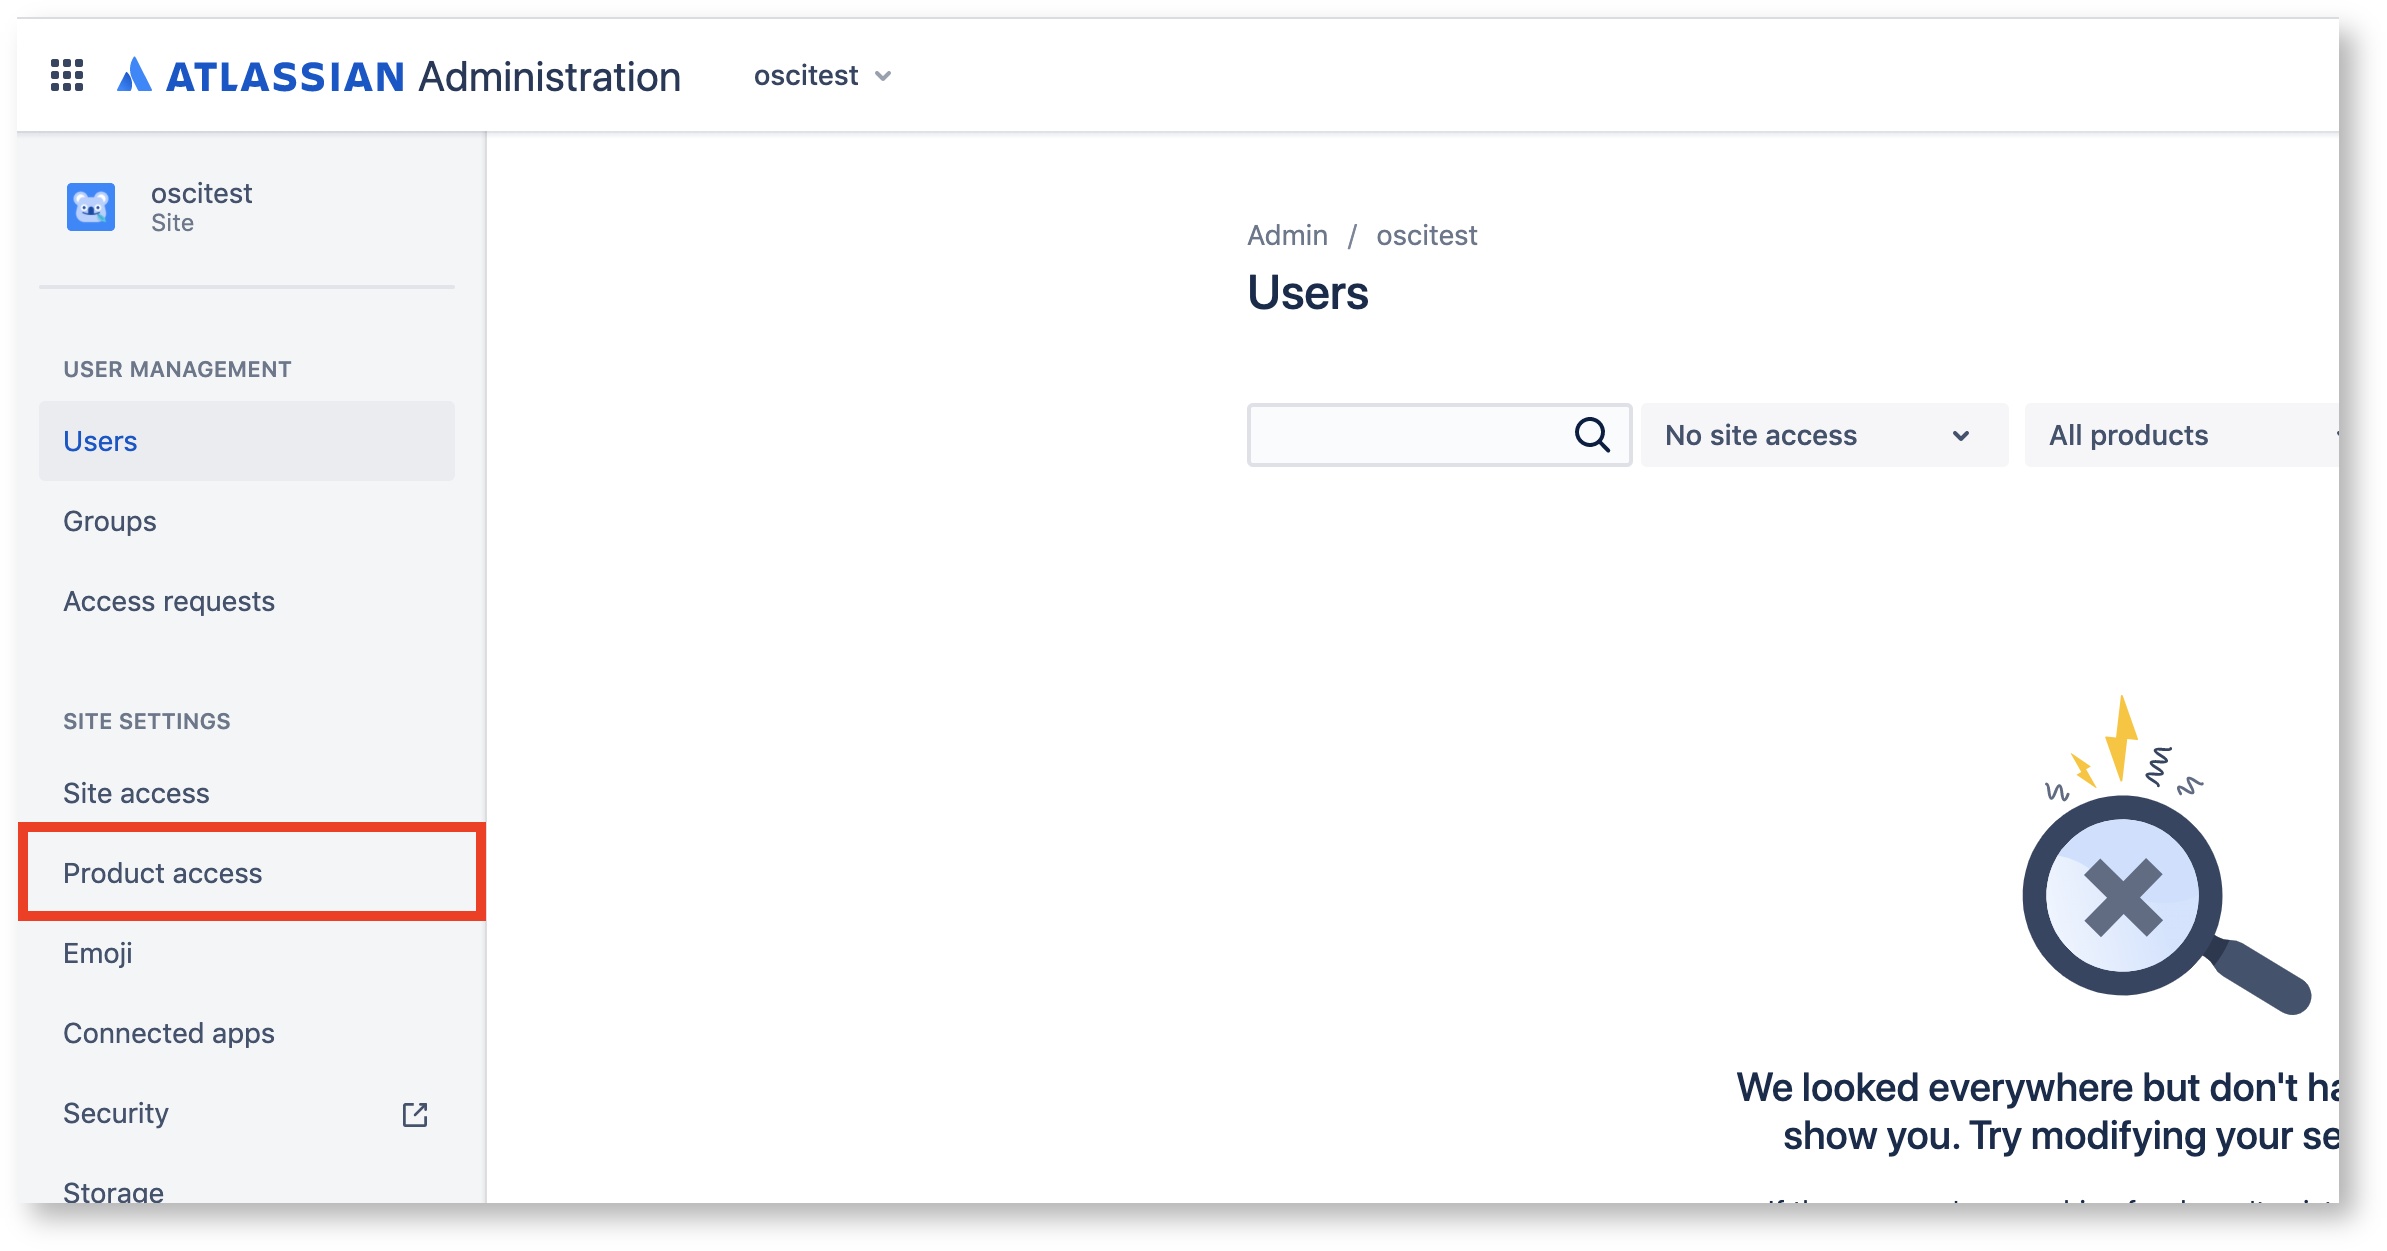
2. The group settings of the licensed users product access need to be changed.


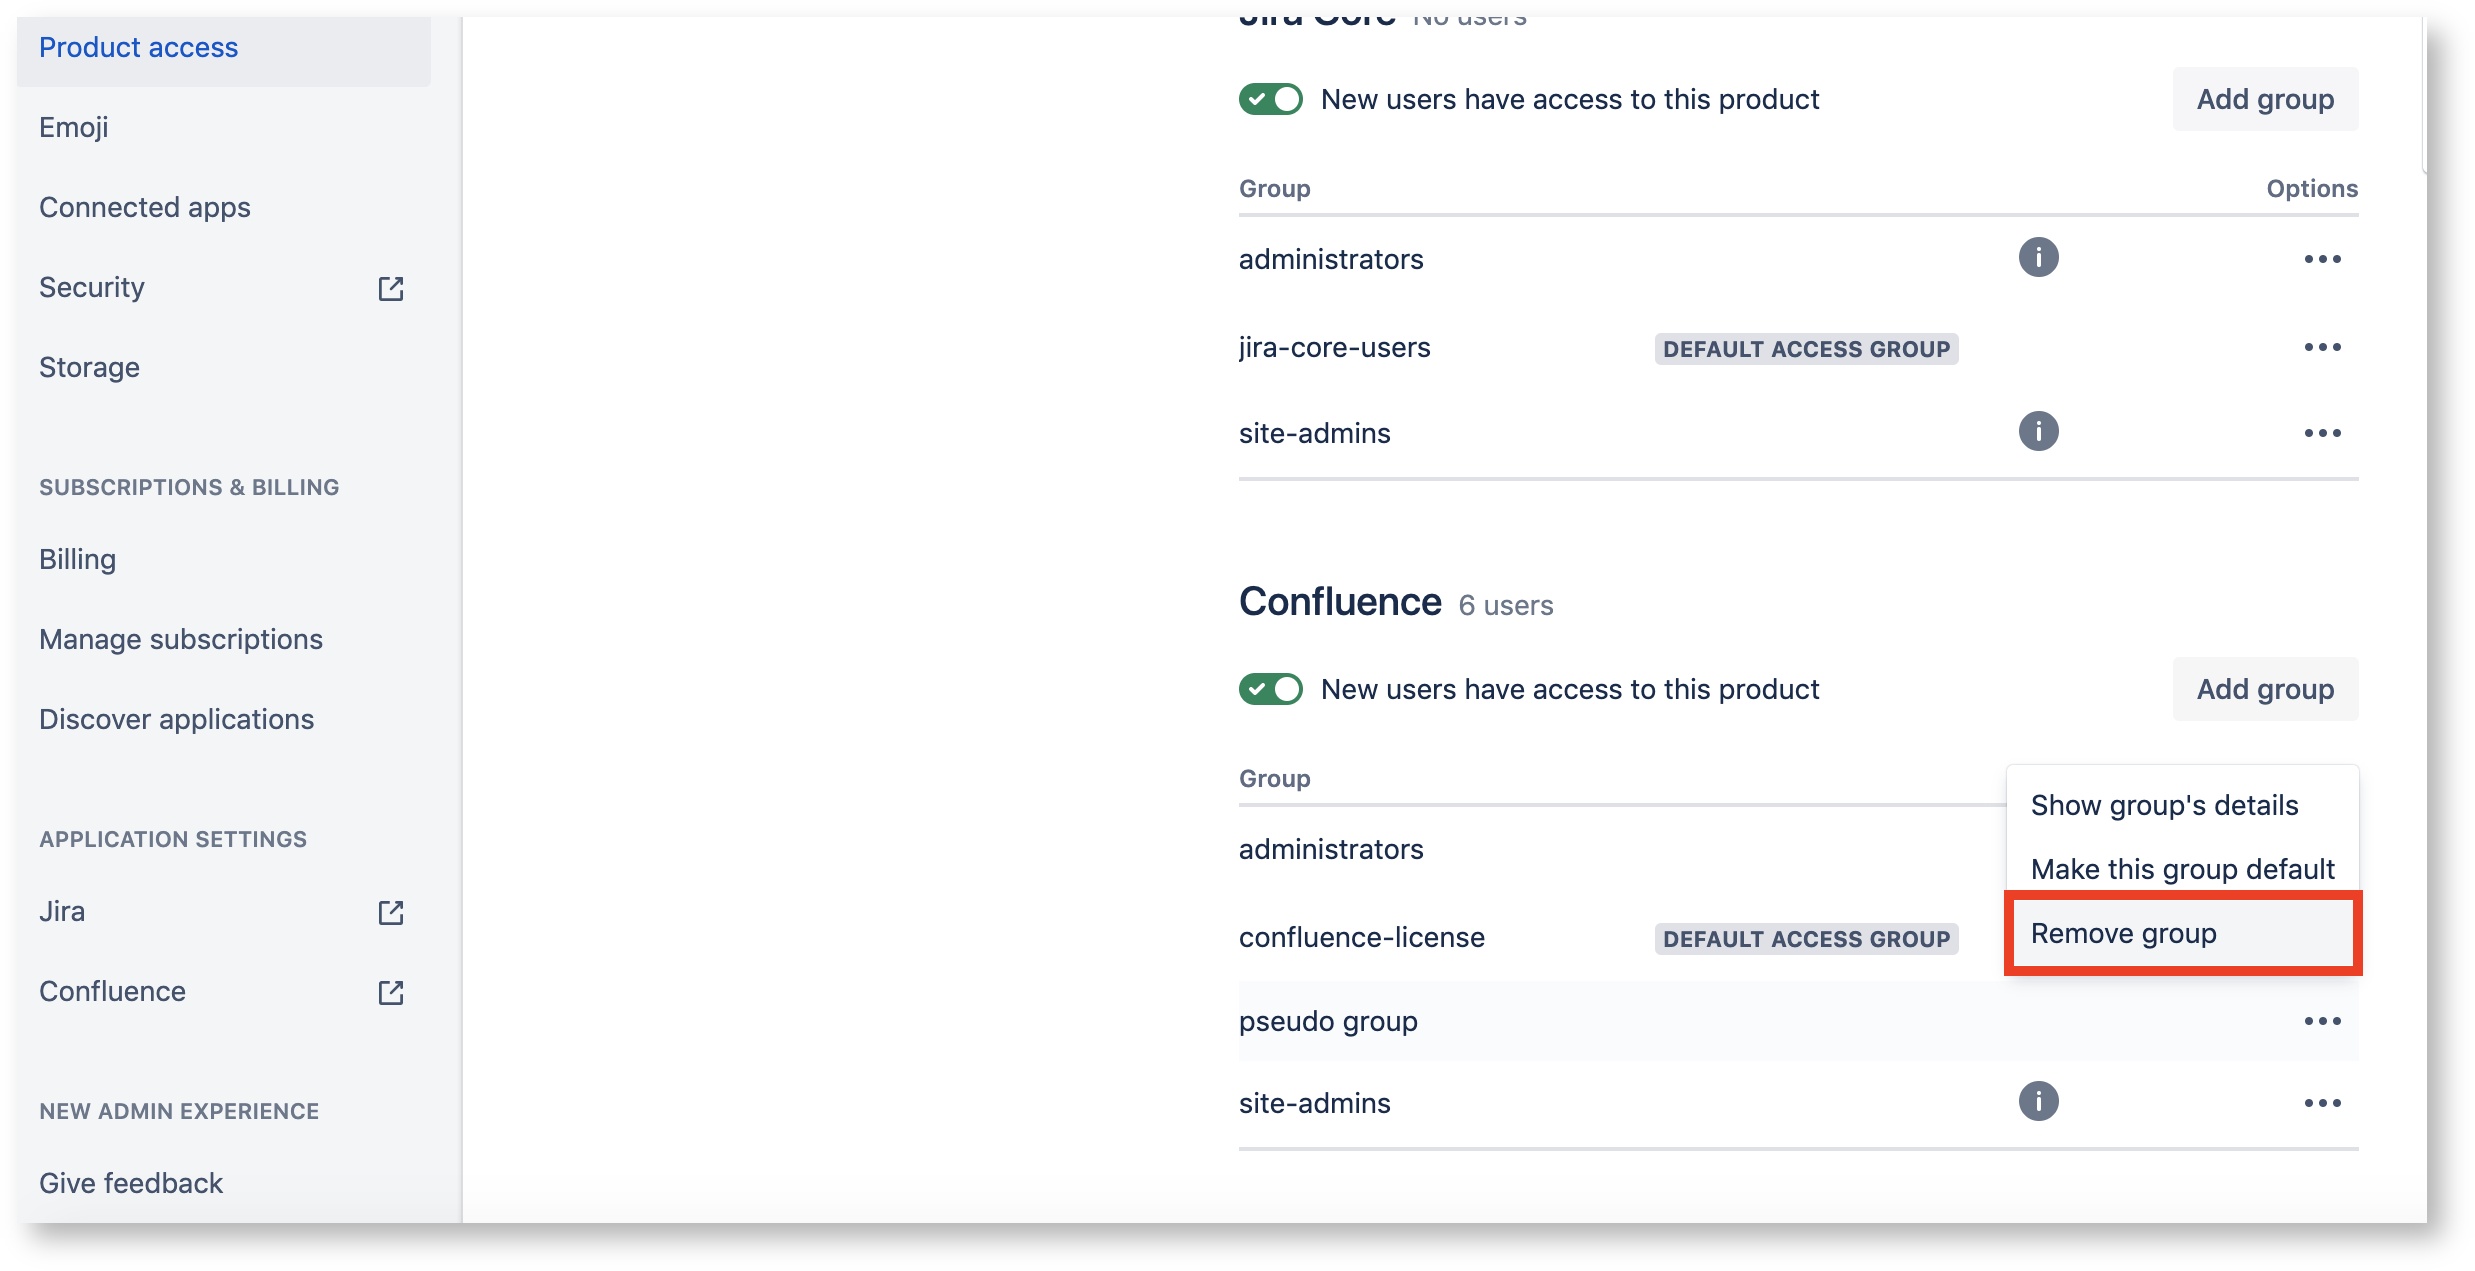
4. Remove all groups except Admin group and one group to be used as the license group of Flexible User License.

5. When unchecking is completed, click the [Save all] button at the bottom to save.

| Tip |
|---|
If you want to manage the Admin group not to be affected by Flexible User License, you can set the group as 'can use' status. Then, users in the Admin group always maintain the license as it was assigned. |
2.3 User Directory Configuration
For crowd server users, additional configuration steps are needed in the [User Directories] menu.
1. Click the [Users & Security> User Directories] menu.
2. Click the [Add Directory] button at the bottom.

3. Select 'Atlassian Crowd' from the directory type and click the [Next] button.

4. In the Atlassian Crowd server configuration, select ‘Read/Write’ in ‘Crowd Permissions’.